Posts

Started once again ....

Image
With some spare time in the holidays, I have resumed the build ....  First thing i did was make some room for the buttons in my flawed CP layout, now there is some room for the buttons to sit. I also need to router the CP top from behind to give it enough throw distance.  I then cut fixed two battens to the sides of the inner monitor panel, and a large sheet of MDF across them.  I then measured the size of the TV screen I am going to use and used that as a template to mark the centre.  I cut the hole I marked out with a jigsaw and planed it to get any bumps out. I then fixed it to the battens Next step is going to fix the flexible ply to around the bends 
Image
Rebated the inner shelf sides for the plywood to fit nicely  More rebating .... Today started the CP box. Sorted the width of the digital photo frames This is how it will sit  CP box sitting on the main cabinet. (my custom MAME cabinet in the backgroung needing its new display to be installed) 

Progress ....

Image
Marked out the side panels after getting some more MDF.  Rough Plans  Cut out, Slight backward tilt, and used a flush bit on the router to make a duplicate.  Made a bloody mess!! MDF dust gets everywhere! Temporarily attached side panels to bottom cabinet.   Packing up at the end of the day is a bit of a pain because of a lack of a fixed workspace.  Fixed the CP bottom tray to the bottom cabinet Created a top section to mount the tv, and also bought some 3mm Plywood to bend around the front. 

it has BEGUN .....

Image
The build has finally begun! I have been really busy with school so there hasn't been much progress as of late. But school holidays started today and I bought my 2 pieces of 2400x1200x18 MDF. Got home and started cutting!  Step 1: Build the bottom cabinet  FIRST CUT! Using my sketchup model, I had the dimensions to start. I went with a 1050mm x 650mm base cabinet, as this would give me a good height and a width that would minimise the side bezel of the tv.  Rough plans I drew up ...  Tomorrows Job - Start the Side panels and top tray, including the CP bench.  Also going to need some more MDF, so a trip to Bunnings as well. 

Design Choices ....

Image
So I have been drafting in SketchUp, this is what I have so far ......  Still need to do the bevels and the buttons on the side of the CP. 

weird ....

Image
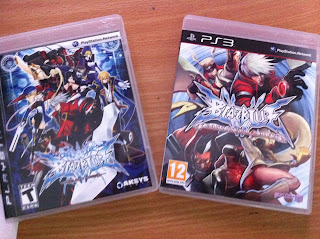
I ordered BlazBlue: Calamity Trigger, BlazBlue: Continuum Shift and Marvel Vs Capcom 3 all in the same order, but only both BlazBlue's came .... burn.  Well here they are, and may I just say, crazy ass game! I really need to get this thing built, playing on your own is boring as hell!

The Bad comes with the Good ...

Image
So bad news first, Semitsu buttons are going to take another 7 days longer roughly while the place I ordered them gets more stock, so more waiting ....  Still waiting for MvC3 and both BlazBlue's ... hmmmmmmm  Good news, my Kaiser Baas Digital photo frames came in and they are super thin and exactly what I wanted. 1 minor thing that bugs me (and might affect the final design) is that the image colours are distorted if the frames are sitting flat in front of the player controls. It needs to be tilted toward the player slightly for the colours to look good... so I don't know what I may have to do there yet.  The 8" LED digital frames displaying Akuma and Blanka's SSF4 Movelists.